Category Archives: Crafty

Upholstering a Door

I’ve wanted to do this project for a few months.  I saw an article in Martha Stewart Living where they simply drove tacks into a door for decoration and while the door wasn’t upholstered, it gave me the idea to add padding and a great fabric instead of going through the dreaded task of painting a door.

I chose a teal vinyl tablecloth for the fabric for several reasons.  1. I’m addicted to teal, 2. It looks like leather and 3. It was cheaper than leather by about 5x.  I had originally taken the closet door off its hinges and stored it in the garage because I had grand ideas for making the inside of my closet 100% organized and stylish for my clients to see how well I have it all together.  As most closets go, it was super organized about one day out of the month.  Also, with the coming addition to our family, I noticed all over my house, multiple areas that needed better baby-proofing.  So I started with the closet door.

I wouldn’t have driven a hundred holes into a nice door – it looked like this before I started:

I also removed the doorknob because I wanted to fix a knocker in the center of the door to get a nice old England vibe going, and to avoid having to upholster around a doorknob.

I started by laying the door on the floor of our living room and coating it with fabric glue.  I then laid down a piece of quilter’s batting (heavy loft) and trimmed along the edges to make it fit perfectly.  Then, I moved the door to my dining table to begin the process of covering it with the vinyl.  This step wasn’t so easy and it wasn’t until my dad came to the rescue that I actually got the hang of how to do it.  You see, he is a master craftsman and has been a carpenter his whole life and has upholstered his fair share of couches, chairs, etc.  So he brought his industrial staple gun (a life saver) and compressor and lent me a BIG set of hands to pull the vinyl tight enough so that there were no bumps or creases and we stapled the vinyl along the sides of the door.

Once it was completely covered, we sketched out a design for the rivets and stapled that design down, which is an insanely genius move on my dad’s part.  My talented friend, Kelle, who also knows a thing or two about home decor, told me that in order to save my sanity, I’d BETTER order nail head trim, instead of buying 1,000+ tacks at my local leather shop.  Wise girl.  The nail head trim looks perfect and you only have to nail down every 5th tack.  It’s about $15 for a 10 yard roll!  Once I was done, I screwed the antique door knocker I bought off Etsy to the center and voila – a really expensive looking door for about $50 total!

The nail trim – looks legit!

The antique door knocker:

The finished product!

8 Comments

Filed under Crafty, General Hoo-Ha

Future Project

I absolutely loved this idea that I found on the great blog, Better After.  Aside from the horrible hot pink and zebra stripes, I thought it was a genius project to get to do for a little one (heck, we know I’d be playing with this just as much as the kid.)  And depending on the sex, it could be girlified or more boyish with paint colors and the amount of fake knives 🙂

Imagine how affordable an old entertainment center would be at Goodwill or any of the other thrift stores in this town!  Those kitchen sets at stores, especially big ones are fun but all plastic-y and too many pieces to lose.  This way, you could fill the little kitchen with discarded items from your own kitchen (that I’ll teach TC to use on his/her own, of course.)  And one this size would be epic!  Just have to find room for it…maybe an outdoor grill version, haha.  Yay!  I can’t wait for our kid to be old enough to do cool stuff with.  I know, I’m rushing things 🙂  But seriously, babies don’t really do much for a few years.  I am very excited to see the personality and imagination that our kiddo will have.  I’ve mourned the loss of my imagination for years now – it will be good to get to see the world new again.


2 Comments

Filed under Crafty, Parenting and the like

Before and After

Well I finally have a reason to set up my guest bedroom all cute.  My cousin, Kathleen, is taking summer sessions at Tech and so for July, she is staying with us!  I saw this blog a long time ago and fell in love with this girl’s style and interior design.  She is seriously amazing.  Click the link at the top to take a tour of her home.  So I admit that I blatantly copied the color scheme and style from her master bedroom for my guest room.  A few tweaks here and there to make it my own, but there are some embarrassingly copycat moments like (not intending to) buy the EXACT same throw pillow she did from Target.

So to appreciate the make-over, here are some before pics:

Not much to look at.  The bed was angled because the sweet mom that lived in our house before us spackled a ginormous snowman on the wall for her little girl.  This snowman was essentially the texture and hardness of cement and came about 1/8th of an inch out from the wall.  So while I could paint over it, the snowman’s shadow was still incredibly detectable and thus, the cornered bed.  When it came time to redo the room, I went at that snowman like a crazed lunatic.  60 grit sandpaper, putty scrapers, chisels, blowtorches.  Eventually, I got enough of the snowman off the wall that he is no longer detectable to anyone who didn’t know he was there in the first place.  Good enough for me.

The desk I found at a thrift store for $20.  I had to rough it up so that it would take paint as the entire thing is laminate.  It just had so much potential and was the perfect little size for our little room.

So without further ado, the room now:

Dark gray paint on one wall, light gray on the others.  With yellow and red accents all over.  See over there by the window?  Oh wait, you don’t see a snowman?  Good!

This is my favorite spot.  Found those two mirrors at the Lubbock Women’s Club annual garage sale.  They used to be harvest gold and forest green.  The little ledge was black and gold – found at Hobby Lobby half off!  It’s amazing what a can of white spray paint will do.  Oh, and that clock has to be wound up to run.  How very retro 🙂

The little desk that could!  Chrome drawer pulls and simple white paint and a slightly dented lamp from Pier One, making it $24 instead of $60!  Oh, and I’ll have a wee update in about a week.  I commissioned the fine ladies at All About Looks, whom I’ve done pictures for in the past, to make me a curtain to hang in place of the closet door.  Trust me – it’s going to rock.  It’s a huge white and yellow floral/bird pattern.  I love the material and can’t wait to see it!  Oh, also, that cute little switchplate  cover is just a spray-painted 4×6 picture frame hung around the original cover.

Is that not the coolest wall decal you’ve ever seen?  Got it from Bilk – they are an awesome company and it was incredibly easy to put on the wall, despite how it looks.  And I LOVE how it looks!

That wardrobe used to be mint green and ivory.  I had inherited it from Libby Melton, who inherited it from her aunt.  It is actually quite old.  My dad figures around the early 1900s based on its hardware.  It’s got the same drawer pulls as the desk. (but I saved the antique wooden pulls!)

I have to talk about this headboard.  My mom and I did most of it together this past weekend.  It was a labor of love and we didn’t cut corners!  It’s on 1/2″ plywood, I drilled holes through the 2″ foam, and the wood and we pulled and tied buttons through the board to create the tufting.  Then, to tie everything together, I added some leftover buttons to the plain white shams I got from Bed Bath and Beyond.

View from this angle – that bedspread coverlet was at Bed Bath and Beyond as well.  Gray with white stitching – so pretty.

Hello, cute pillow from Pier One.  Have I told you lately that I love you?

And there you have it.  Again, totally admitting to completely ripping off Three Men and a Lady’s master bedroom ideas, but hey – imitation is the sincerest form of imitation, right?  🙂

9 Comments

Filed under Crafty, General Hoo-Ha

Mosaic Frames

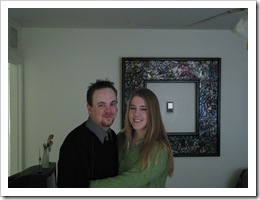
I have made two gigantic frames in my life since college.  The first one I made with a left-over frame that my Dad didn’t sell in his furniture factory and said I could have to do what I pleased.  So I laid it out on my bedroom floor of my apartment my junior year of college and made a collage with magazine clippings in the border of the frame.  Then, I decided to glue glass shards on top of the magazine clippings.  Then I decided to put black grout in between the shards, thus making my very first mosaic frame.  I really liked the stained-glass effect it had and since there was nothing in my apartment to frame with a 3×3 foot frame (it was so enormously heavy) I decided with the anchors of life that I would frame my thermostat. (as you can see below in a picture of a thinner, cuter version of Matt and I back in 03 before we were married – awww)

Matt and Alisa Thanksgiving 2003 014

Fast forward to two years ago, my dear friend Ashley asked me if I’d use some  candid black and white shots from her wedding and do one of these frames for her.  I accepted.  I accepted even though my previous frame took me an entire fall semester of school to do – and that was when I was single and never went out on the weekends and just worked on the frame.  Imagine putting together a jigsaw puzzle, but creating it at the same time you’re putting it together.  Yeah – it’s hard.  But I told her I would anyway, full knowing that she would not receive it for a long time. 

Fast forward to two weeks ago when I finally finished. Yep – took me two years. (two and a half?)   Now, in my defense, I graduated, moved, got married, moved again and got a dog, so I had plenty of distractions along the way!  And she was patient – yet screaming inside at me to finish the blasted thing.  But yay – now she has it and yay – now I have 4 square feet of extra room in my house now that it’s gone.

I wanted to post these pictures just because I was so proud of it when it was finally done and I felt like I had received the crafting enema of the century when I put that last stroke of paint on the trim. 

If anyone wants one of these I will seriously make one for you with pictures of your loved ones.  For $2,000.  🙂

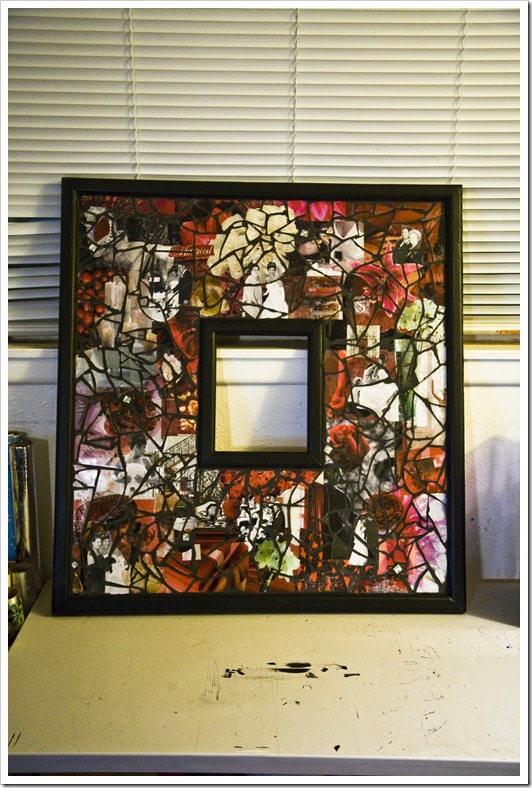
img_0481mosaic

The frame in its entirety


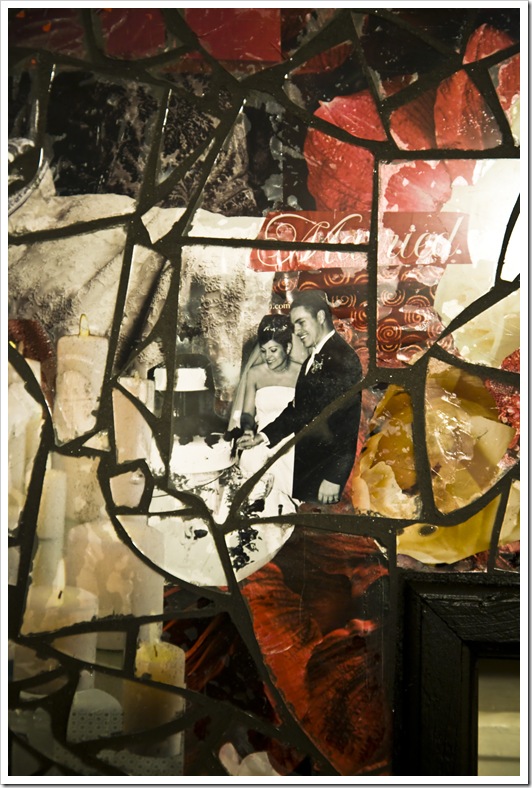
img_0470mosaic

Breaking down into parts – this is the top left corner – my favorite picture of Ashley and Danny cutting their cake – sorry for the glare, some of it is hard to see. 

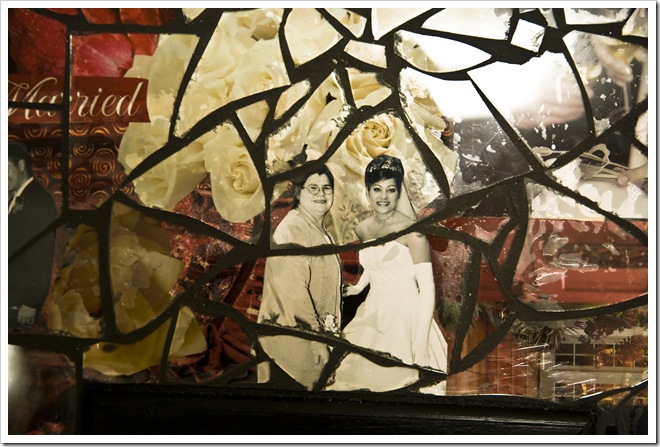
img_0471mosaic

The top middle picture – Ashley and her mom.


img_0480mosaic
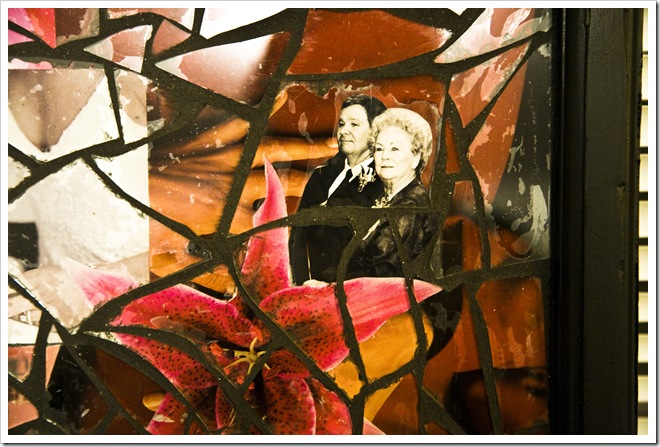
Top right corner – Danny’s grandmother looking on.


img_0472mosaic

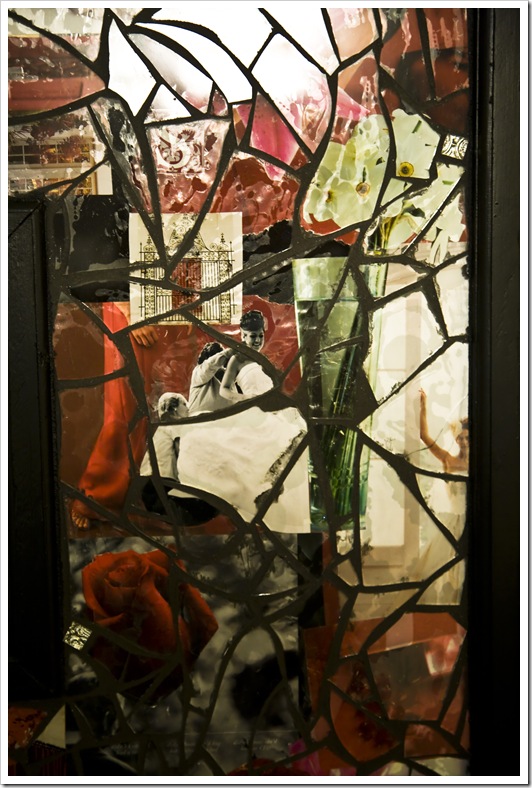
The top right middle – Ashley getting into her dress with her mom and mother-in-law helping.

img_0475mosaic

The bottom right picture – Ashley and Danny at the alter saying vows.


img_0476mosaic

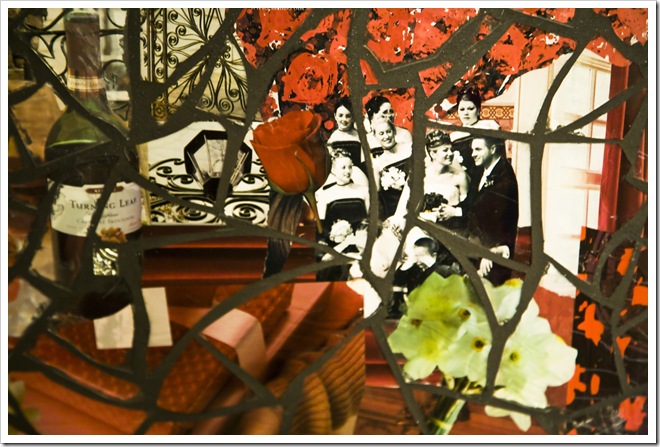
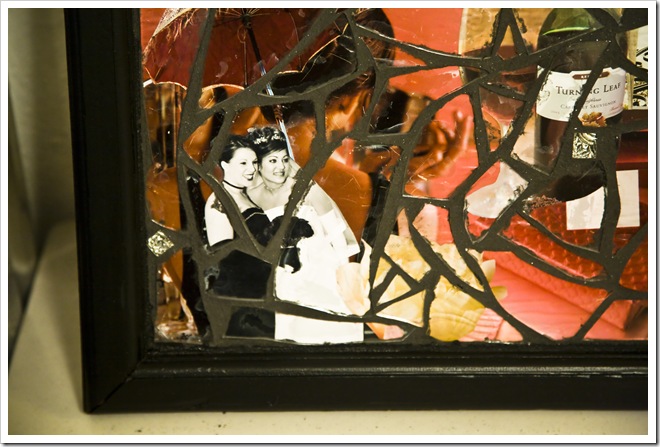
The bottom middle – kind of hard to see, but it’s her bridesmaids and her and Danny sitting for posed pictures.


img_0477mosaic
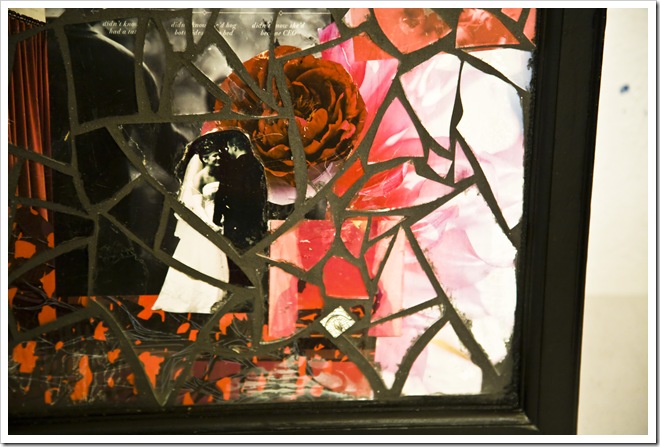
Bottom left corner – Ashley and one of her bridesmaids


img_0479mosaic

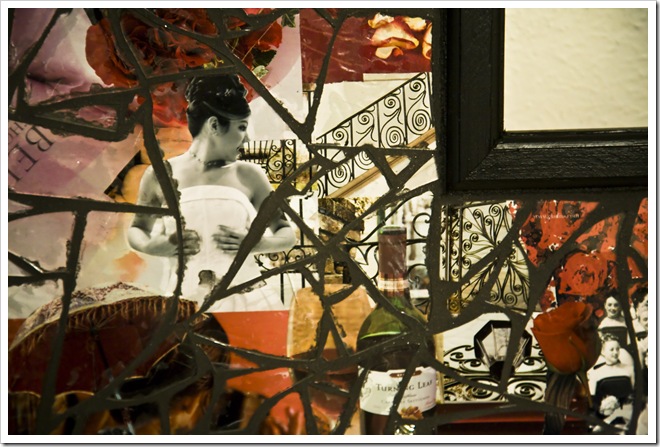
Middle left side going up – Ashley looking back at herself in the mirror.


img_0485mosaic

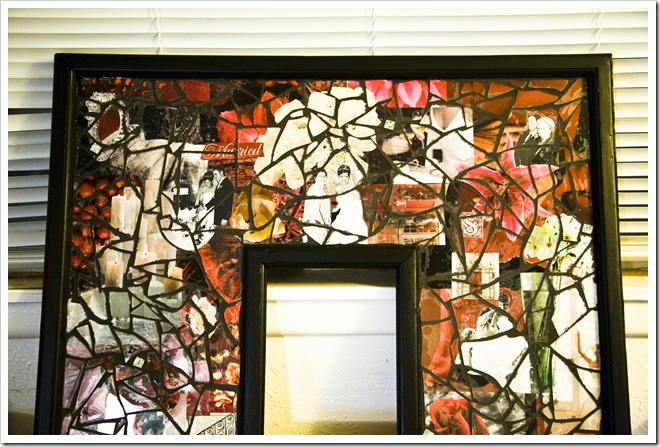
Top Half

img_0484mosaic

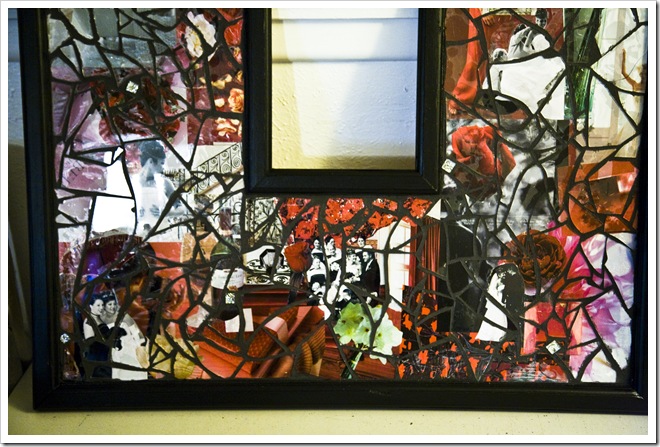
Bottom Half

3 Comments

Filed under Crafty, General Hoo-Ha